A few notes on Control Panel settings
R Zoom on Planets
If selected, the camera will focus on individual planets… otherwise, the Sun
will continuously be the focus of the camera.
V Random
Will cause the camera to focus on the planets in a random order. (Only applies if
Zoom on Planets is selected)
V seQuential
Will cause the camera to focus on the planets in order from the sun… i.e.:
Sol, Mercury, Venus, Earth, Mars, Jupiter, Saturn, Uranus, Neptune and finally Pluto,
before it returns to Sol and repeats the order.
(Only applies if
Zoom on Planets
is selected)
V Specific
Will maintain the camera focus on the specific planet listed in the DropDownBox.
(Only applies if Zoom on Planets is selected)
Planet choice DropDown
Selects the planet that will have the camera's focus. (Only applies if Specific is selected)
QuickAdvance vs SlowAdvance
Selects the speed that the camera approaches the bodies.
Fast Orbit vs Slow Orbit
Selects the speed that the camera rotates around the focus. This rotation is independent
of the orbits of the planets, but can create the illusion that the planets are orbiting
faster than they actually are. A setting of
Fast Orbit
could cause dizziness.
Near Periapsis vs Far Periapsis
The Periapsis of the Camera's orbit is the point at which it approaches nearest
to the body (sun or planet). A setting toward the
Near Periapsis
will go very close to the planet. (the Periapsis, can not be
set further than the Apoapsis)
Near Apoapsis vs Far Apoapsis
The Apoapsis of the Camera's orbit is the point at which it is furthest from the
body (sun or planet). A setting toward the
Far Apoapsis
ill go very far from the planet, to view the whole solar system,
when the camera has fully retreated.
(the Apoapsis, can not be set nearer than the Periapsis)
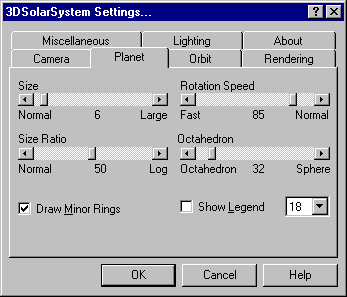
Planets
R Show Legend
This choice will display a Legend showing information about the body in focus.
Font Size DropDown
This controls the Font size of the Legend (if it is enabled by the Show Legend option)
Small Bodies vs Large Bodies
Sets the size of the planetary bodies, Small Bodies
renders the planets at the small sizes that most accurately represents their true
sizes. Large Bodies can be selected to magnify
the size of each planet, and render more detail.
Normal Ratio vs Log Ratio
Controls the relative size of each planetary body to the others, at Normal Ratio, the relative sizes will be acurate, at LogRatio, the sizes
of the planets will be closer to the each other, but the largest will still be larger
than the smallest.
Fast Rotation vs Normal
This control affects the speed at which the planets rotate around their own axis.
If Planet Normal Rotation Speed and Orbit Speed Normal are both set, then the
rotation and orbits will be correct relative to each other.
Octahedron vs Sphere
This control is primarily to affect the speed that the video card can draw the planets.
A choice near Octahedron will render the planets with very few sides, while a choice
near Sphere will render the planets with very many sizes. This choice provides a
way to trade off computer performance versus visual clarity.
R Draw Minor Rings
If this control is selected, a the rings of Jupiter, Neptune and Uranus will be
rendered.
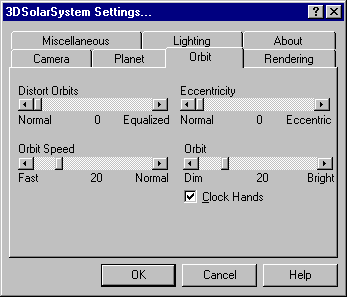
Orbit
Actual Size vs Distort Orbits
Actual Size attempts to show the orbits at their correct relative sizes. Distort
Orbits shows the orbits as if they were all equally spaced. Note: As the Planetary
body size increases, the Orbits are distorted in order to accommodate the size of
the Planet, so that if the Planet sizes are not set to Small Bodies, then some distortion
will always occur regardless of this setting.
Fast vs Normal
Controls the speed at which the planets travel around the sun. If
Planet Normal Rotation Speed
and
Orbit Speed Normal
are both set, then the rotation and orbit speeds will
be correct relative to each other.
Dim vs Bright
Controls how bright the Celestial Grid, Orbital lines and Clock Hands are drawn.
Normal vs Eccentric
At normal, the orbits will be near perfect circles as they are in reality…
the slider can be set toward Eccentric to exaggerate the Eccentricity of the orbits.
The Eccentricity will also exaggerate the speed of travel along the orbit, with
the planets traveling faster at their closest approach to the Sun. This can result
in the more eccentric orbits crossing orbits that they do not actually cross.
R Clock Hands
Draws lines from the sun to each planet… may be helpful when Small Bodies is selected.
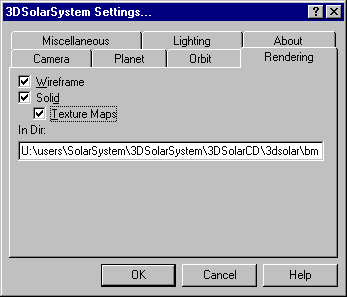
Rendering
R Wireframe
If this control is selected, a wireframe will be rendered around the planet, if
the computer is slow, this setting can be chosen instead of Sold. Wireframes also
include axis, so that the rotations of a body can most clearly be observed. (wireframes
are rendered slightly larger than the planet, in case both solids and wireframe
are rendered)
R Solid
If this control is selected, a the planetary bodies will be rendered as lighted
solid objects, if the computer is slow, this setting may not be desireable.
R Texture Maps
If this control is selected, a map of each planet (commonly called a texture map)
will be rendered on the solid bodies. This will produce the most desired effects.
(Only applies if Solid is selected)
In Dir: [Text Box]
The directory specified in this text box specifies the directory where the program
will try to find the texture maps, normally this is set to C:\windows\3dsolar\bmp but can be set to any directory. (the program
can only use BMP format images, you may provide
your own images or use the images provided with the program.)
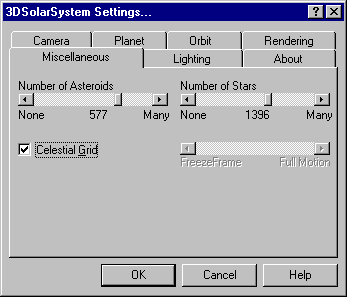
Miscellaneous
Number of Asteroids
This controls the number of Asteroids drawn. A setting toward Many Asteroids will draw the 6000 largest asteroids. When the program
begins, it will not have calculated the orbits of the asteroids, asteroids are added
to the rendering as their orbits are calculated. The ideal setting for this control
will depend both on individual preference, and computer performance.
Number of Stars
Controls the number of stars rendered by the program. A setting toward Many Stars will draw the complete database of 118,000 stars. The ideal
setting for this control will depend both on individual preference, and computer
performance.
Celestial Grid
Shows the Celestial Lattitude and Longitudes.
FreezeFrame vs Full Motion (only for Screen Saver)
Freeze Frame will hold each image for a full second. Full Motion, will attempt
to display 60 frames per second (actual performance will depend on the individual
computer). Smooth animation will be achieved between 15 and 30 frames per second.
The bottom left corner displays the frame rate in Frames Per Second.
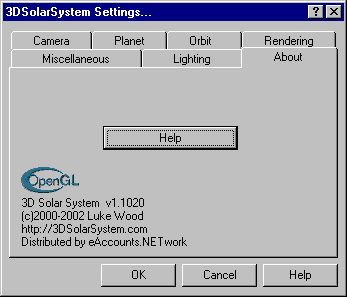
About
Help
Opens a list of settings and commands.
Notes
The most accurate display can be achieved by setting:
Planets: Small Bodies, Normal Ratio, Normal Rotation; Orbits: Actual
Size, Normal, Eccentricity Normal. However this display is generally
not helpful for visualizing the Solar System. The most entertaining display is not
the most accurate.